-
Your shopping cart is empty!

MENU
Your shopping cart is empty!
37003, Nasa Apollo Saturn V, $66
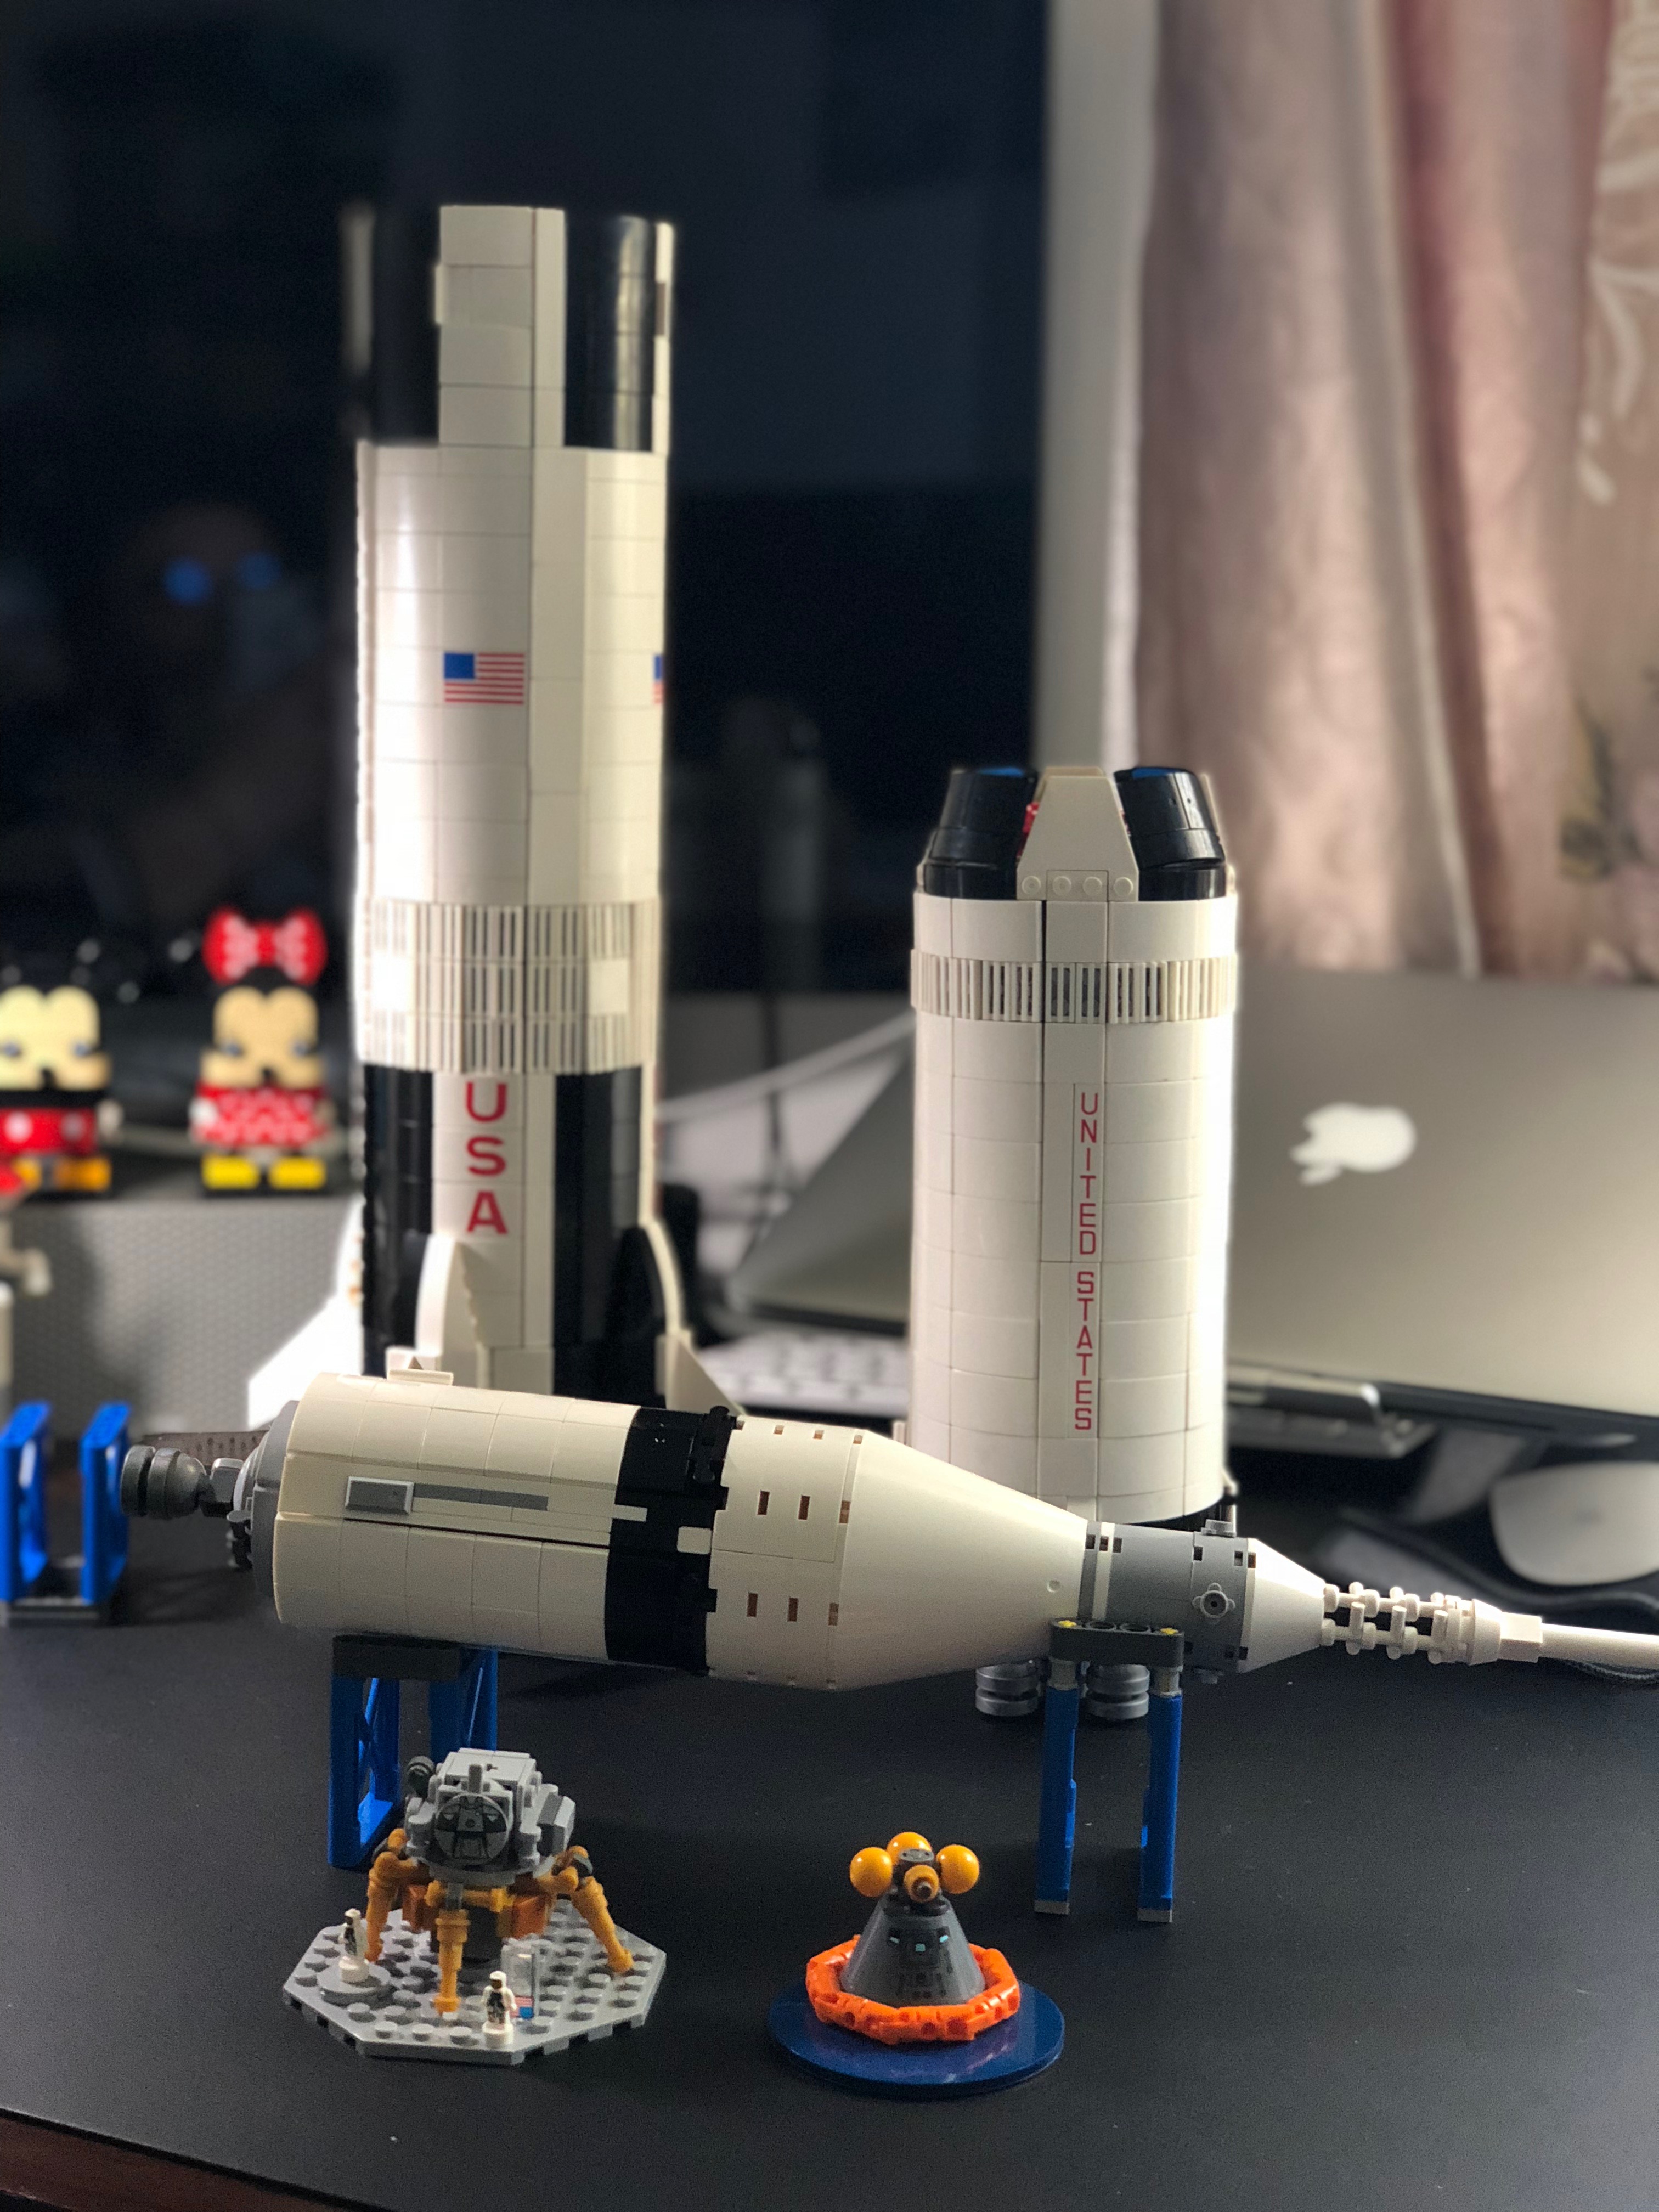
Saturn V is the first rocket to land people on the Moon, it was built by NASA for Apollo program in the 1960s and 1970s, it’s has three stages, each stage would burn its engines until it was out of fuel and would then separate from the rocket. The engines on the next stage would fire, and kept pushing the rocket into the space. The first stage had the most powerful engines, since it had the challenging task of lifting the fully fueled rocket off the ground. It lifted the rocket about 42 miles then second stage carries it from there almost into orbit, and third stage that carried the Apollo spacecraft into Earth orbit and pushed it toward the Moon. The first two stages fell into the ocean after separation, and the third stage either stayed in space or hit the moon. And we get to build this out of bricks, how awesome is that!
Sorting
Saturn V comes in numbered bags, there are total of 12 numbered bags, I only use 4~5 meal-pre-containers for this set, and I didn’t event separate the color, simply pour each bags into its own container.
Building Process
We are building this set from bottom up and inside out, the bottom part is big and fragile, be very careful and do not put too much pressure on it or it will explode. It has some of repeating steps, you can look ahead of instruction, and prepare to make 4 of same big pieces at the same time.
Glue is recommended in this build.
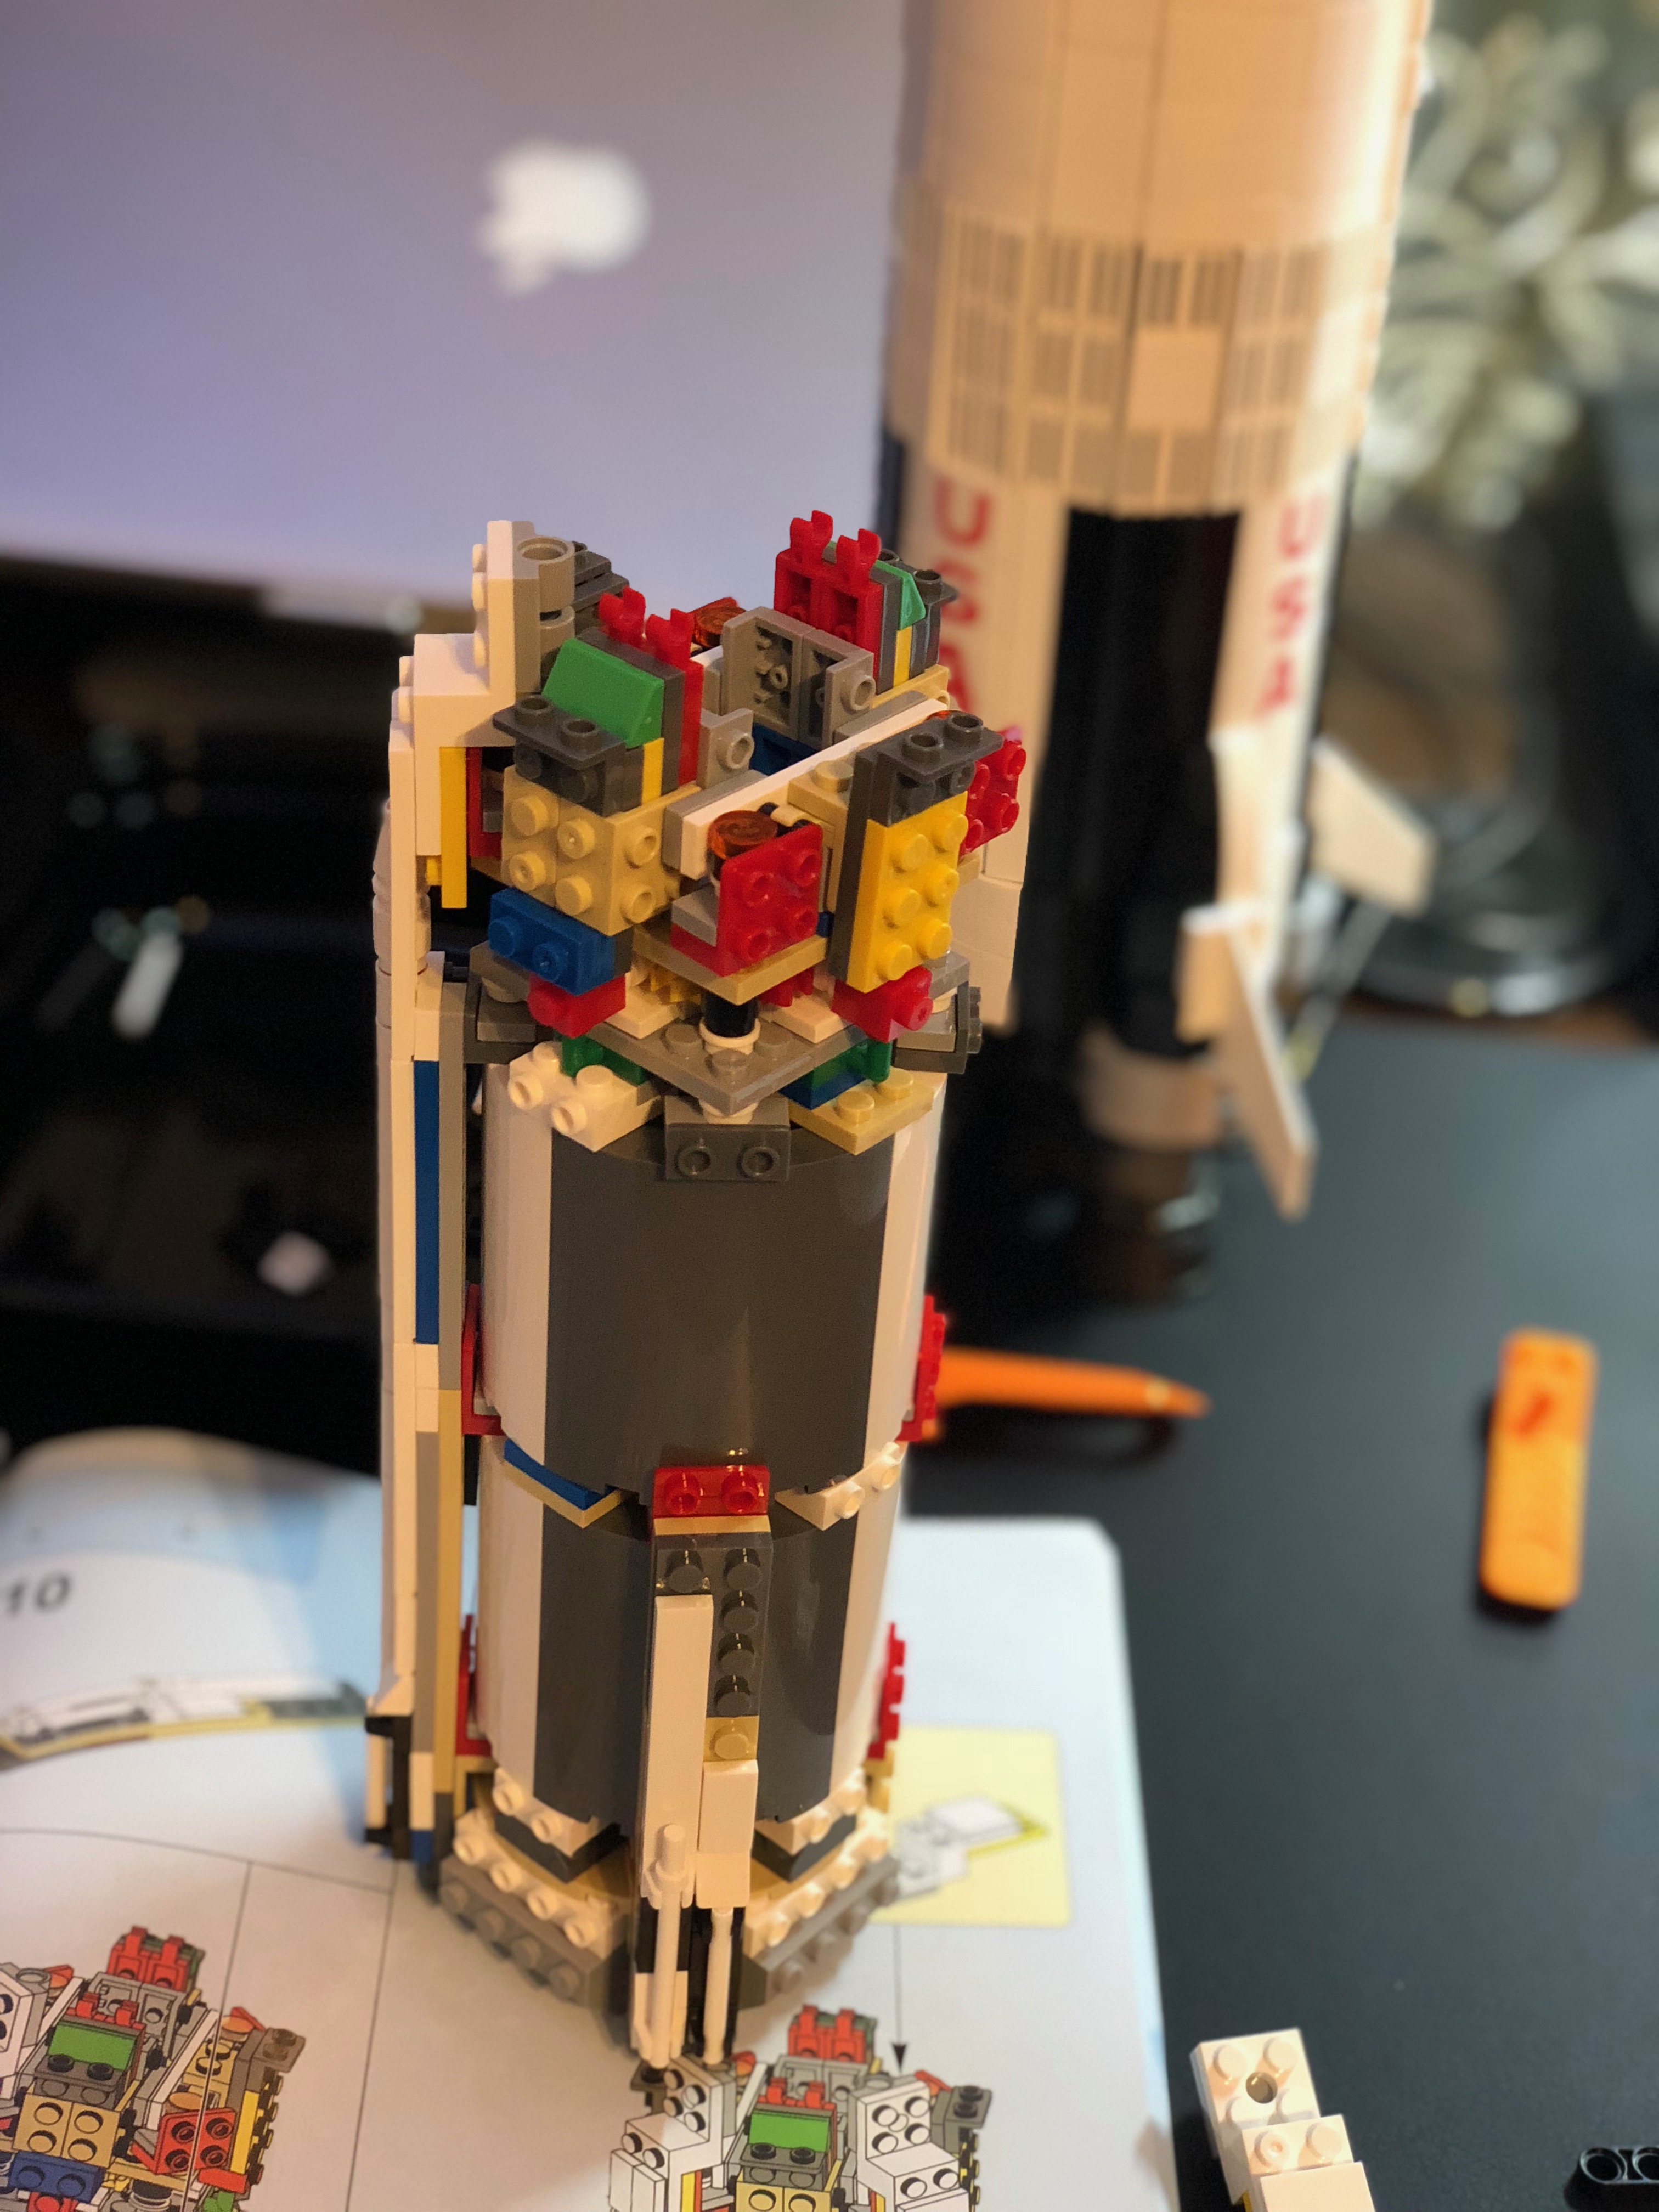
First Stage
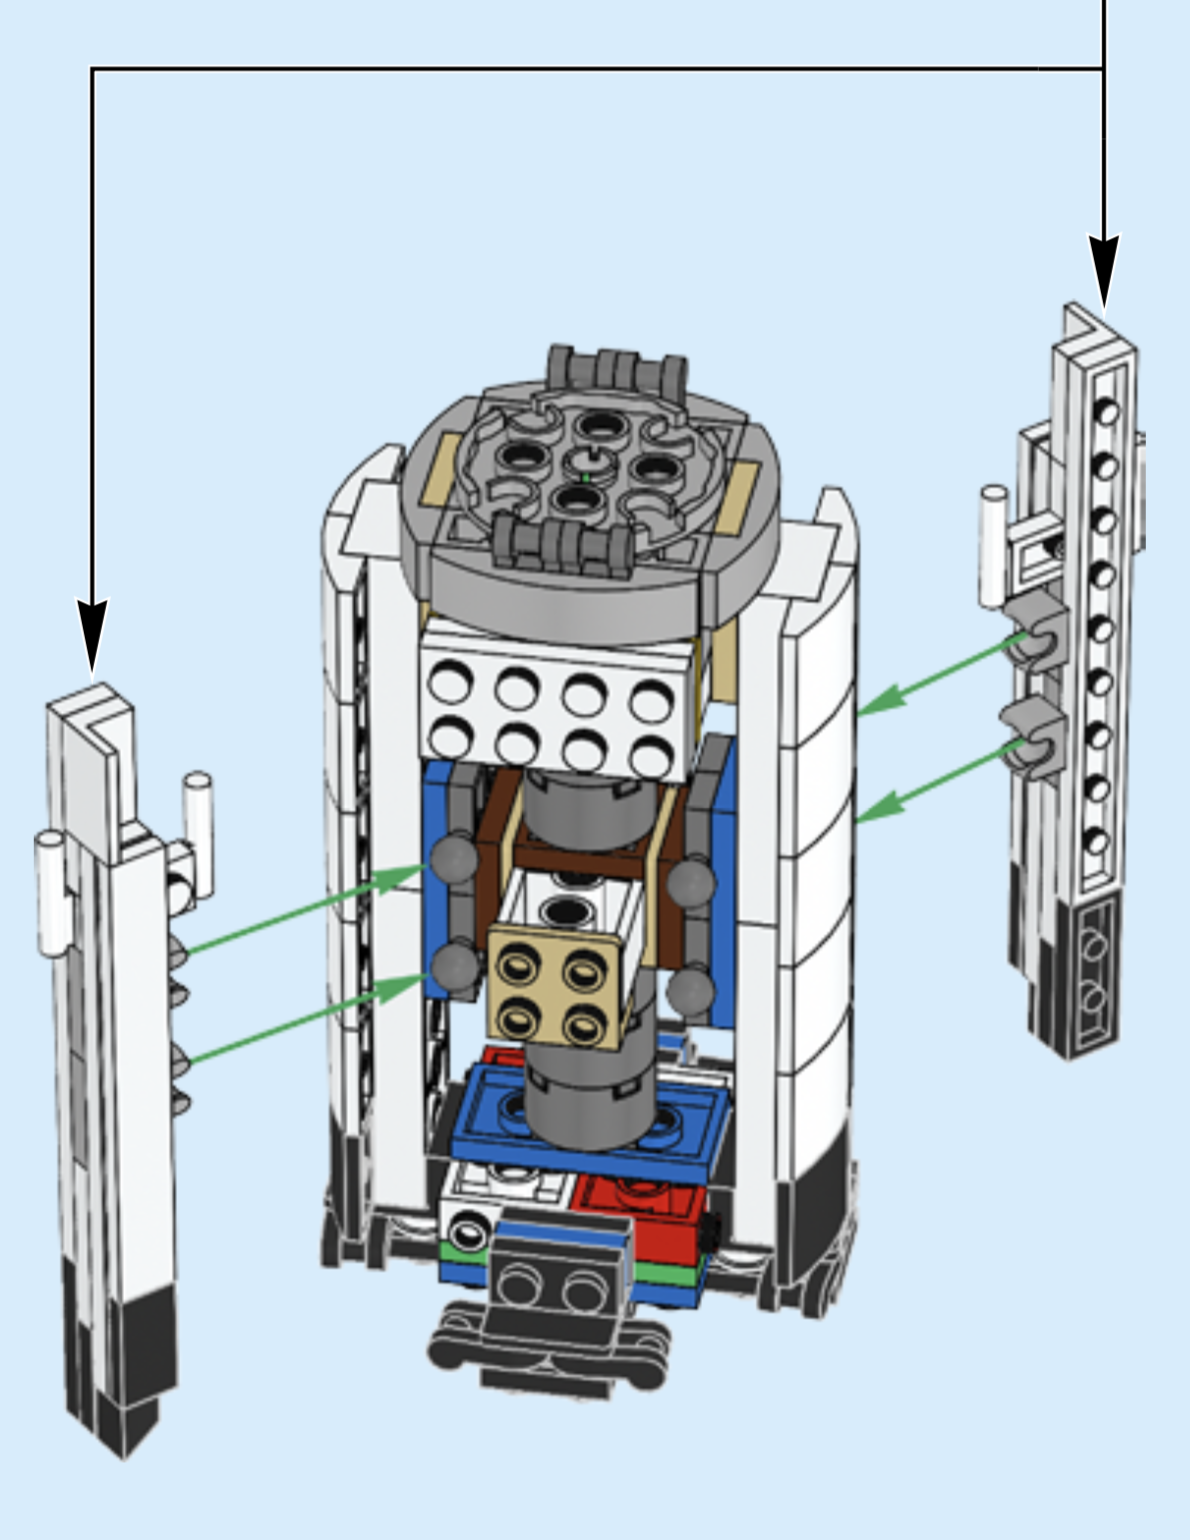
Since first stage is the biggest part for this build, the inner part needs to be extra careful. It’s using 12 x wall element 4x4x6, Round which is empty inside, they don’t sit well on top the base, as well as those red angle plate 1.5 bot 1x2 2/2, I applied a bit of glue on the bottom. When join the bottom with the top inner parts, I also applied some glue, make sure everything lines up as instructed.
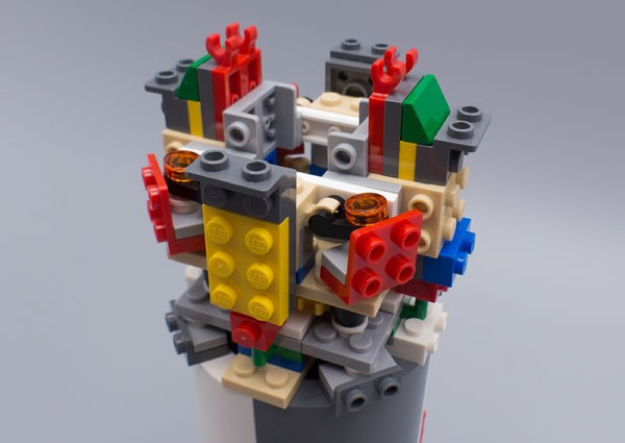
The rocket is made up of 4 sides, when we putting the outer parts (with USA label) on top of the inner parts, we can install two opposite panels at a time, its okay to put some pressure on them from opposite side at this moment, I used separator to make sure the red piece sticks to the panel well. After I installed the 3rd panel, I noticed the rocket tiled toward another side, and I had to pressed the top down to installed the 4thpanel. There are some challenges here, just be patience and take your time.
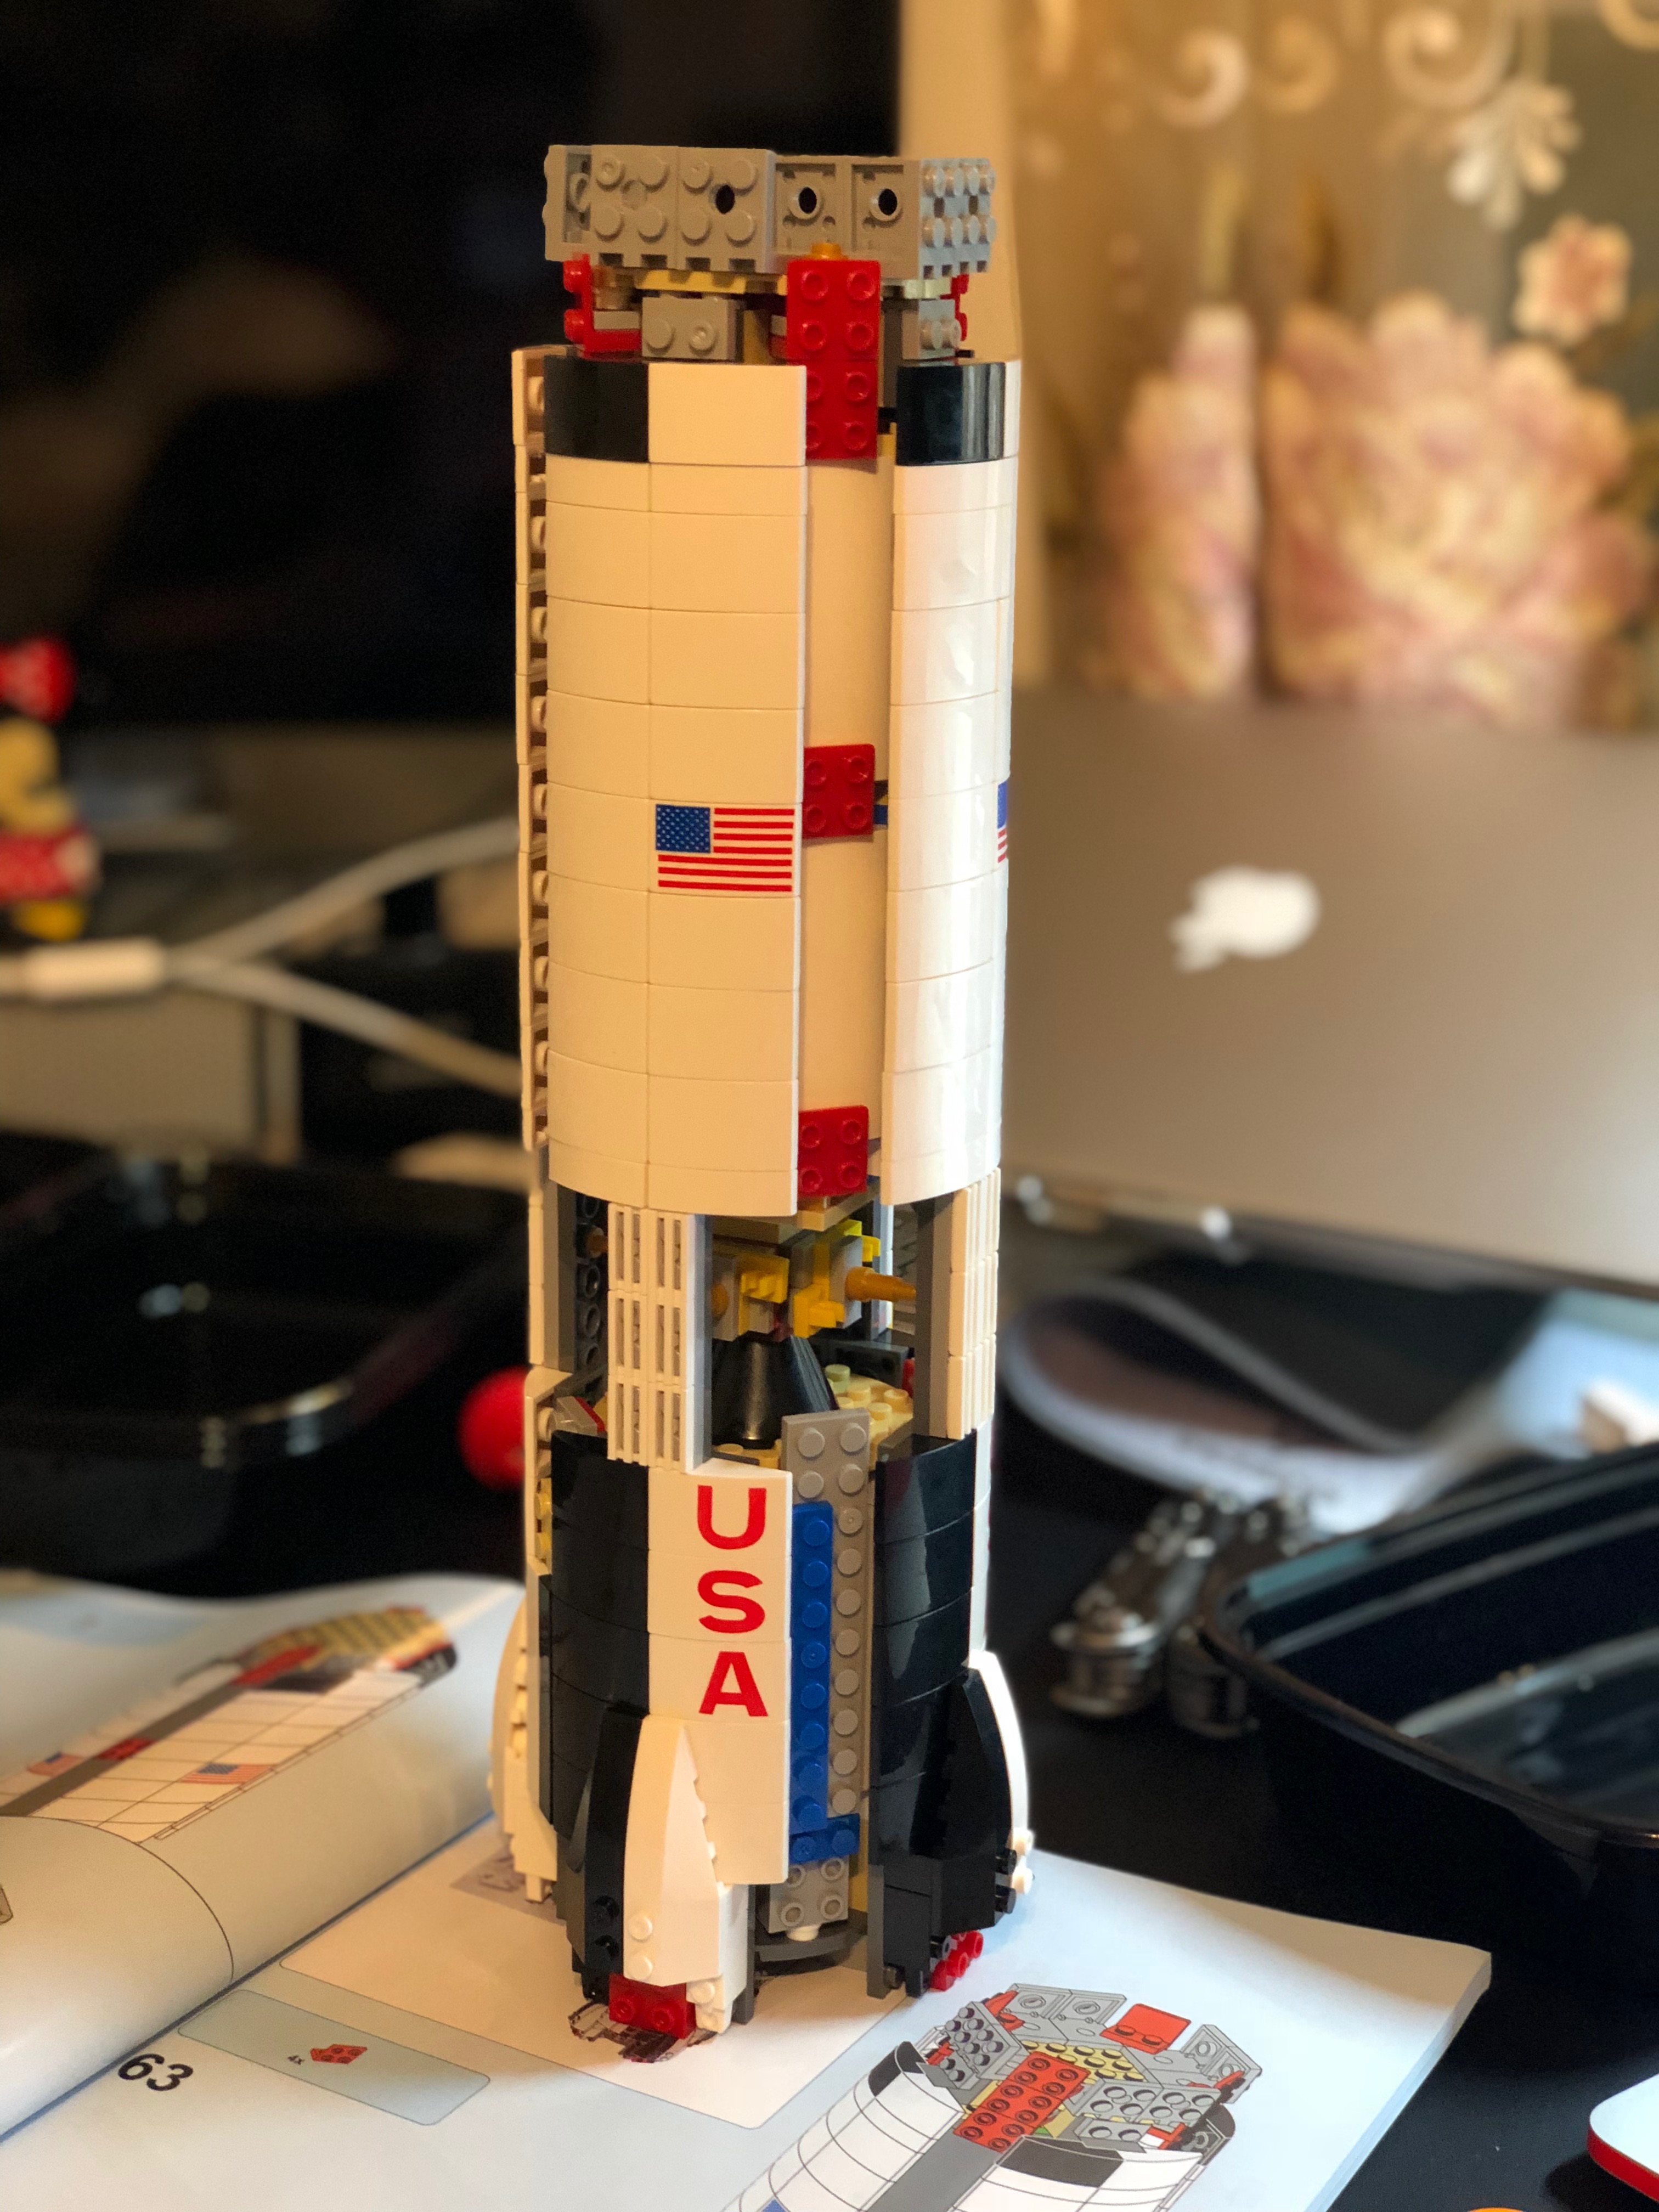
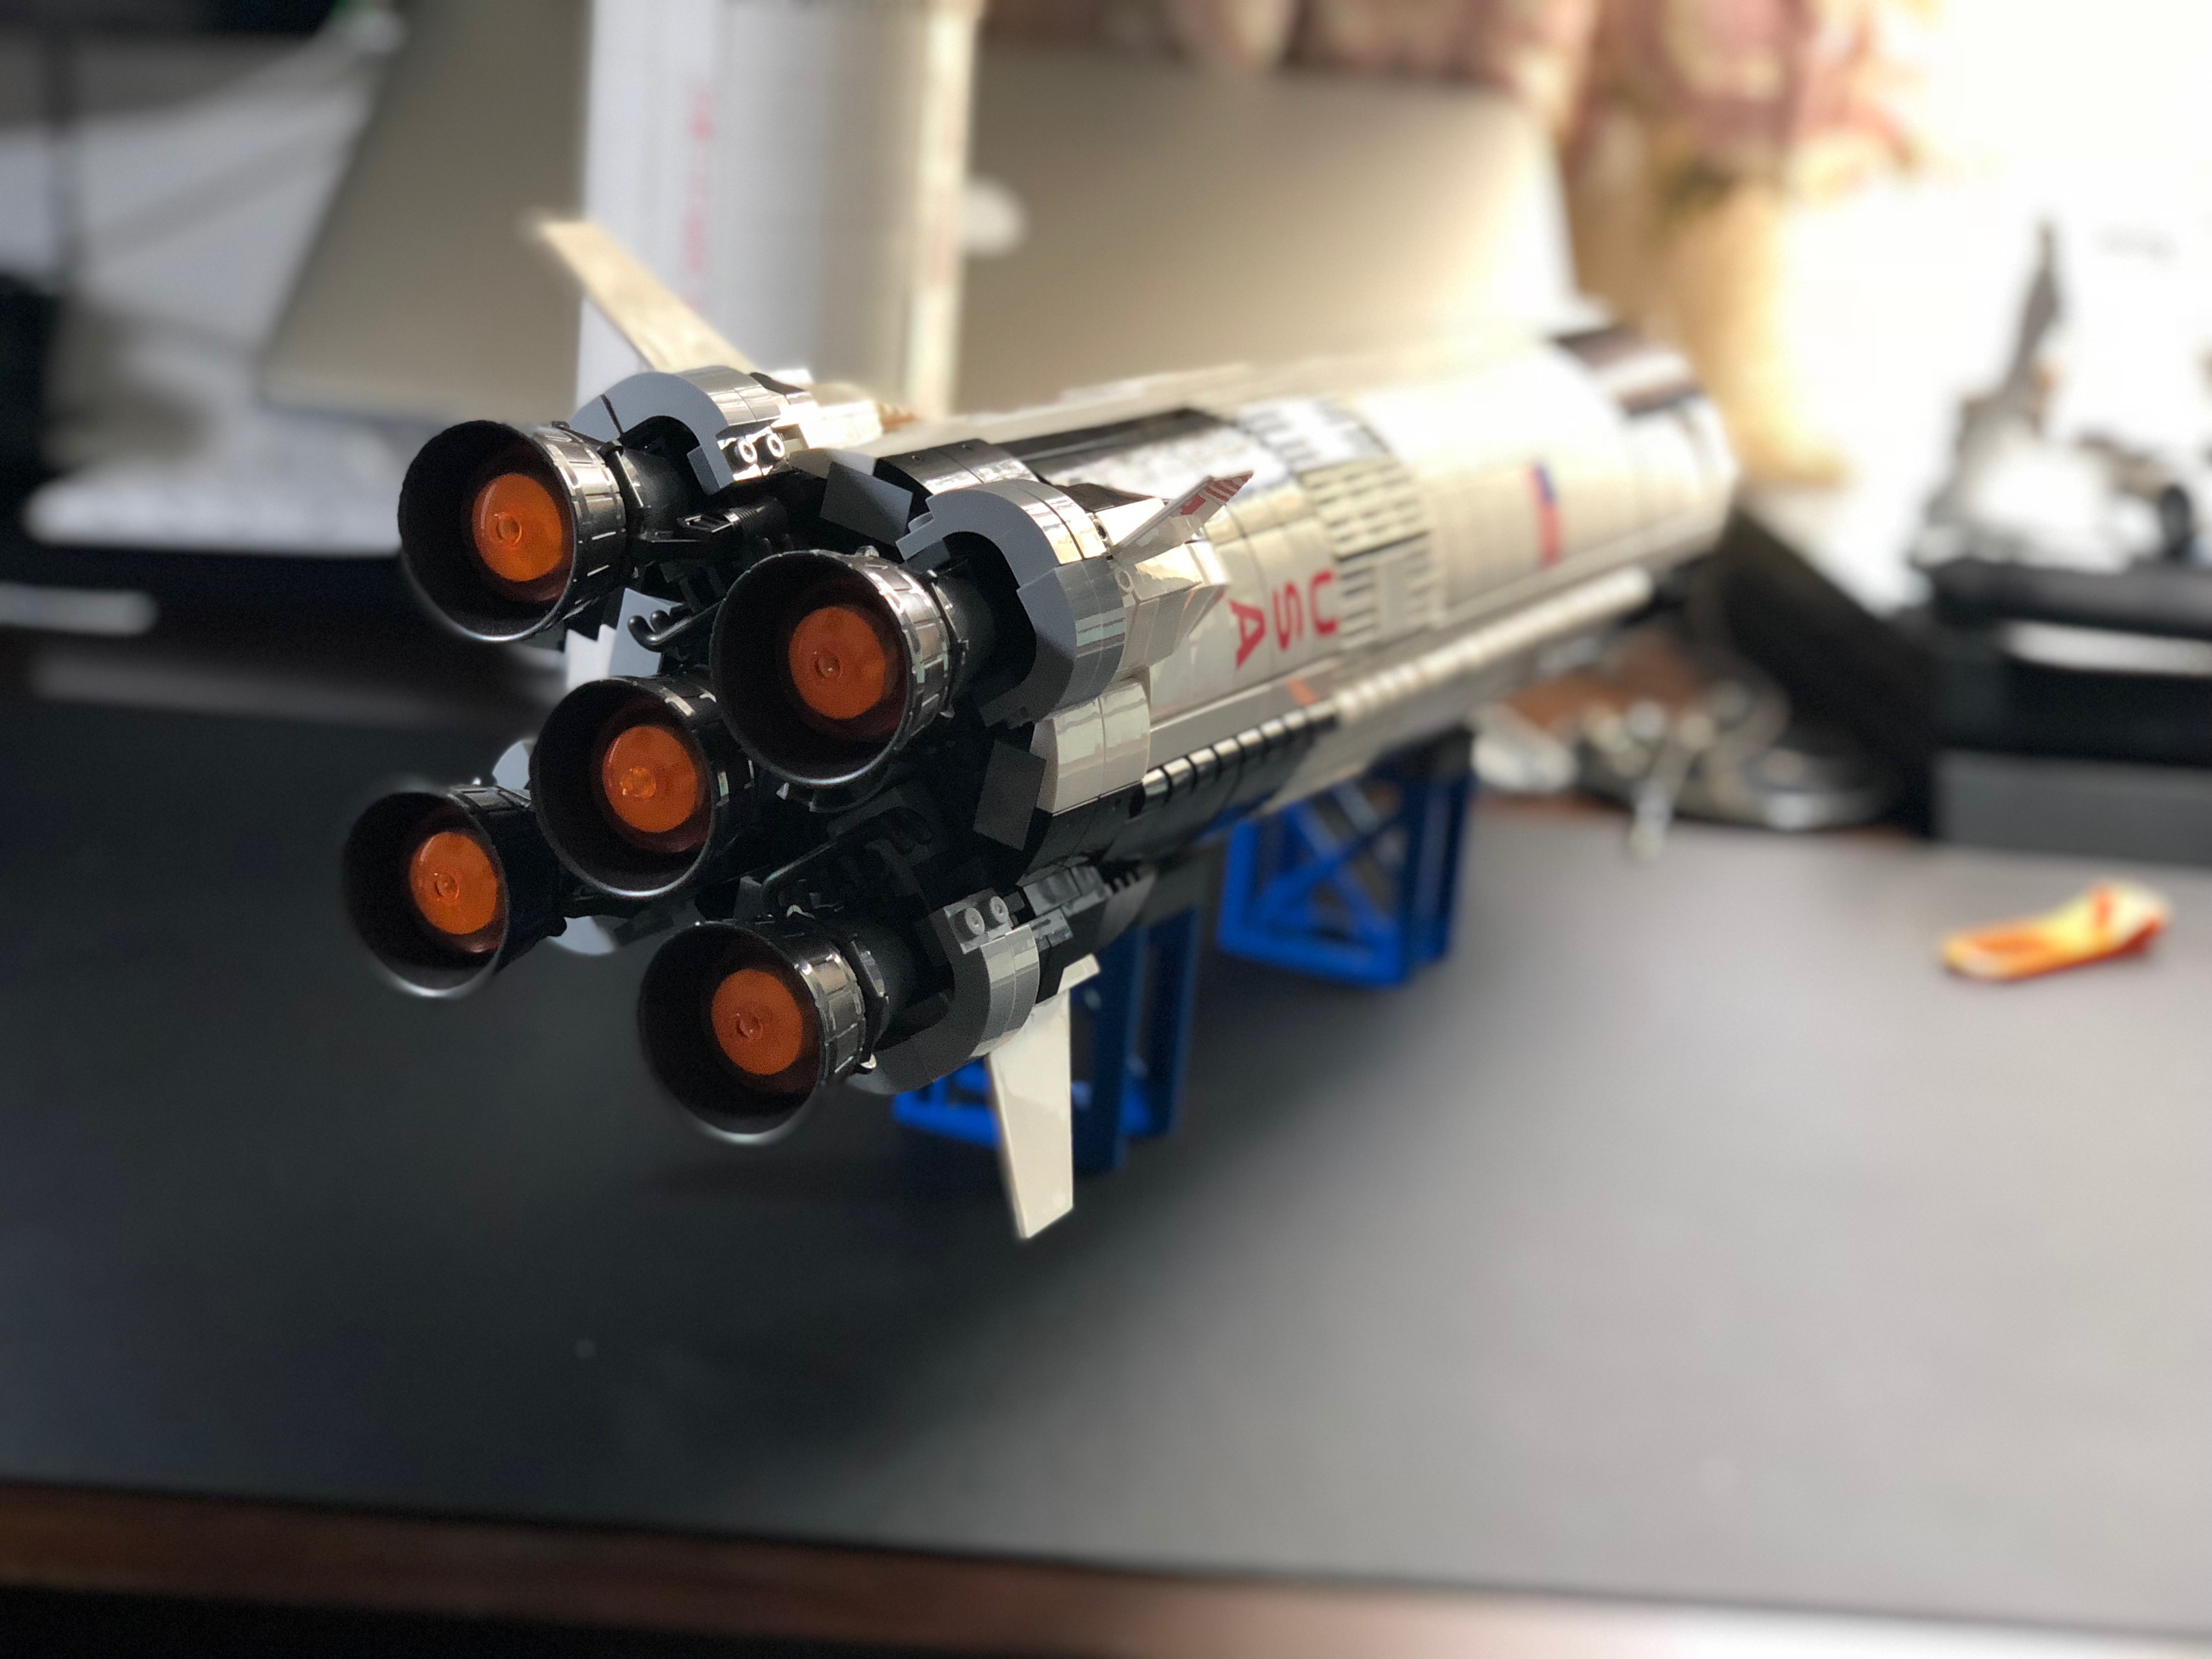
Those exhausts are well-executed, they looked so real. it’s definitely one of the favorite parts of this build for me.
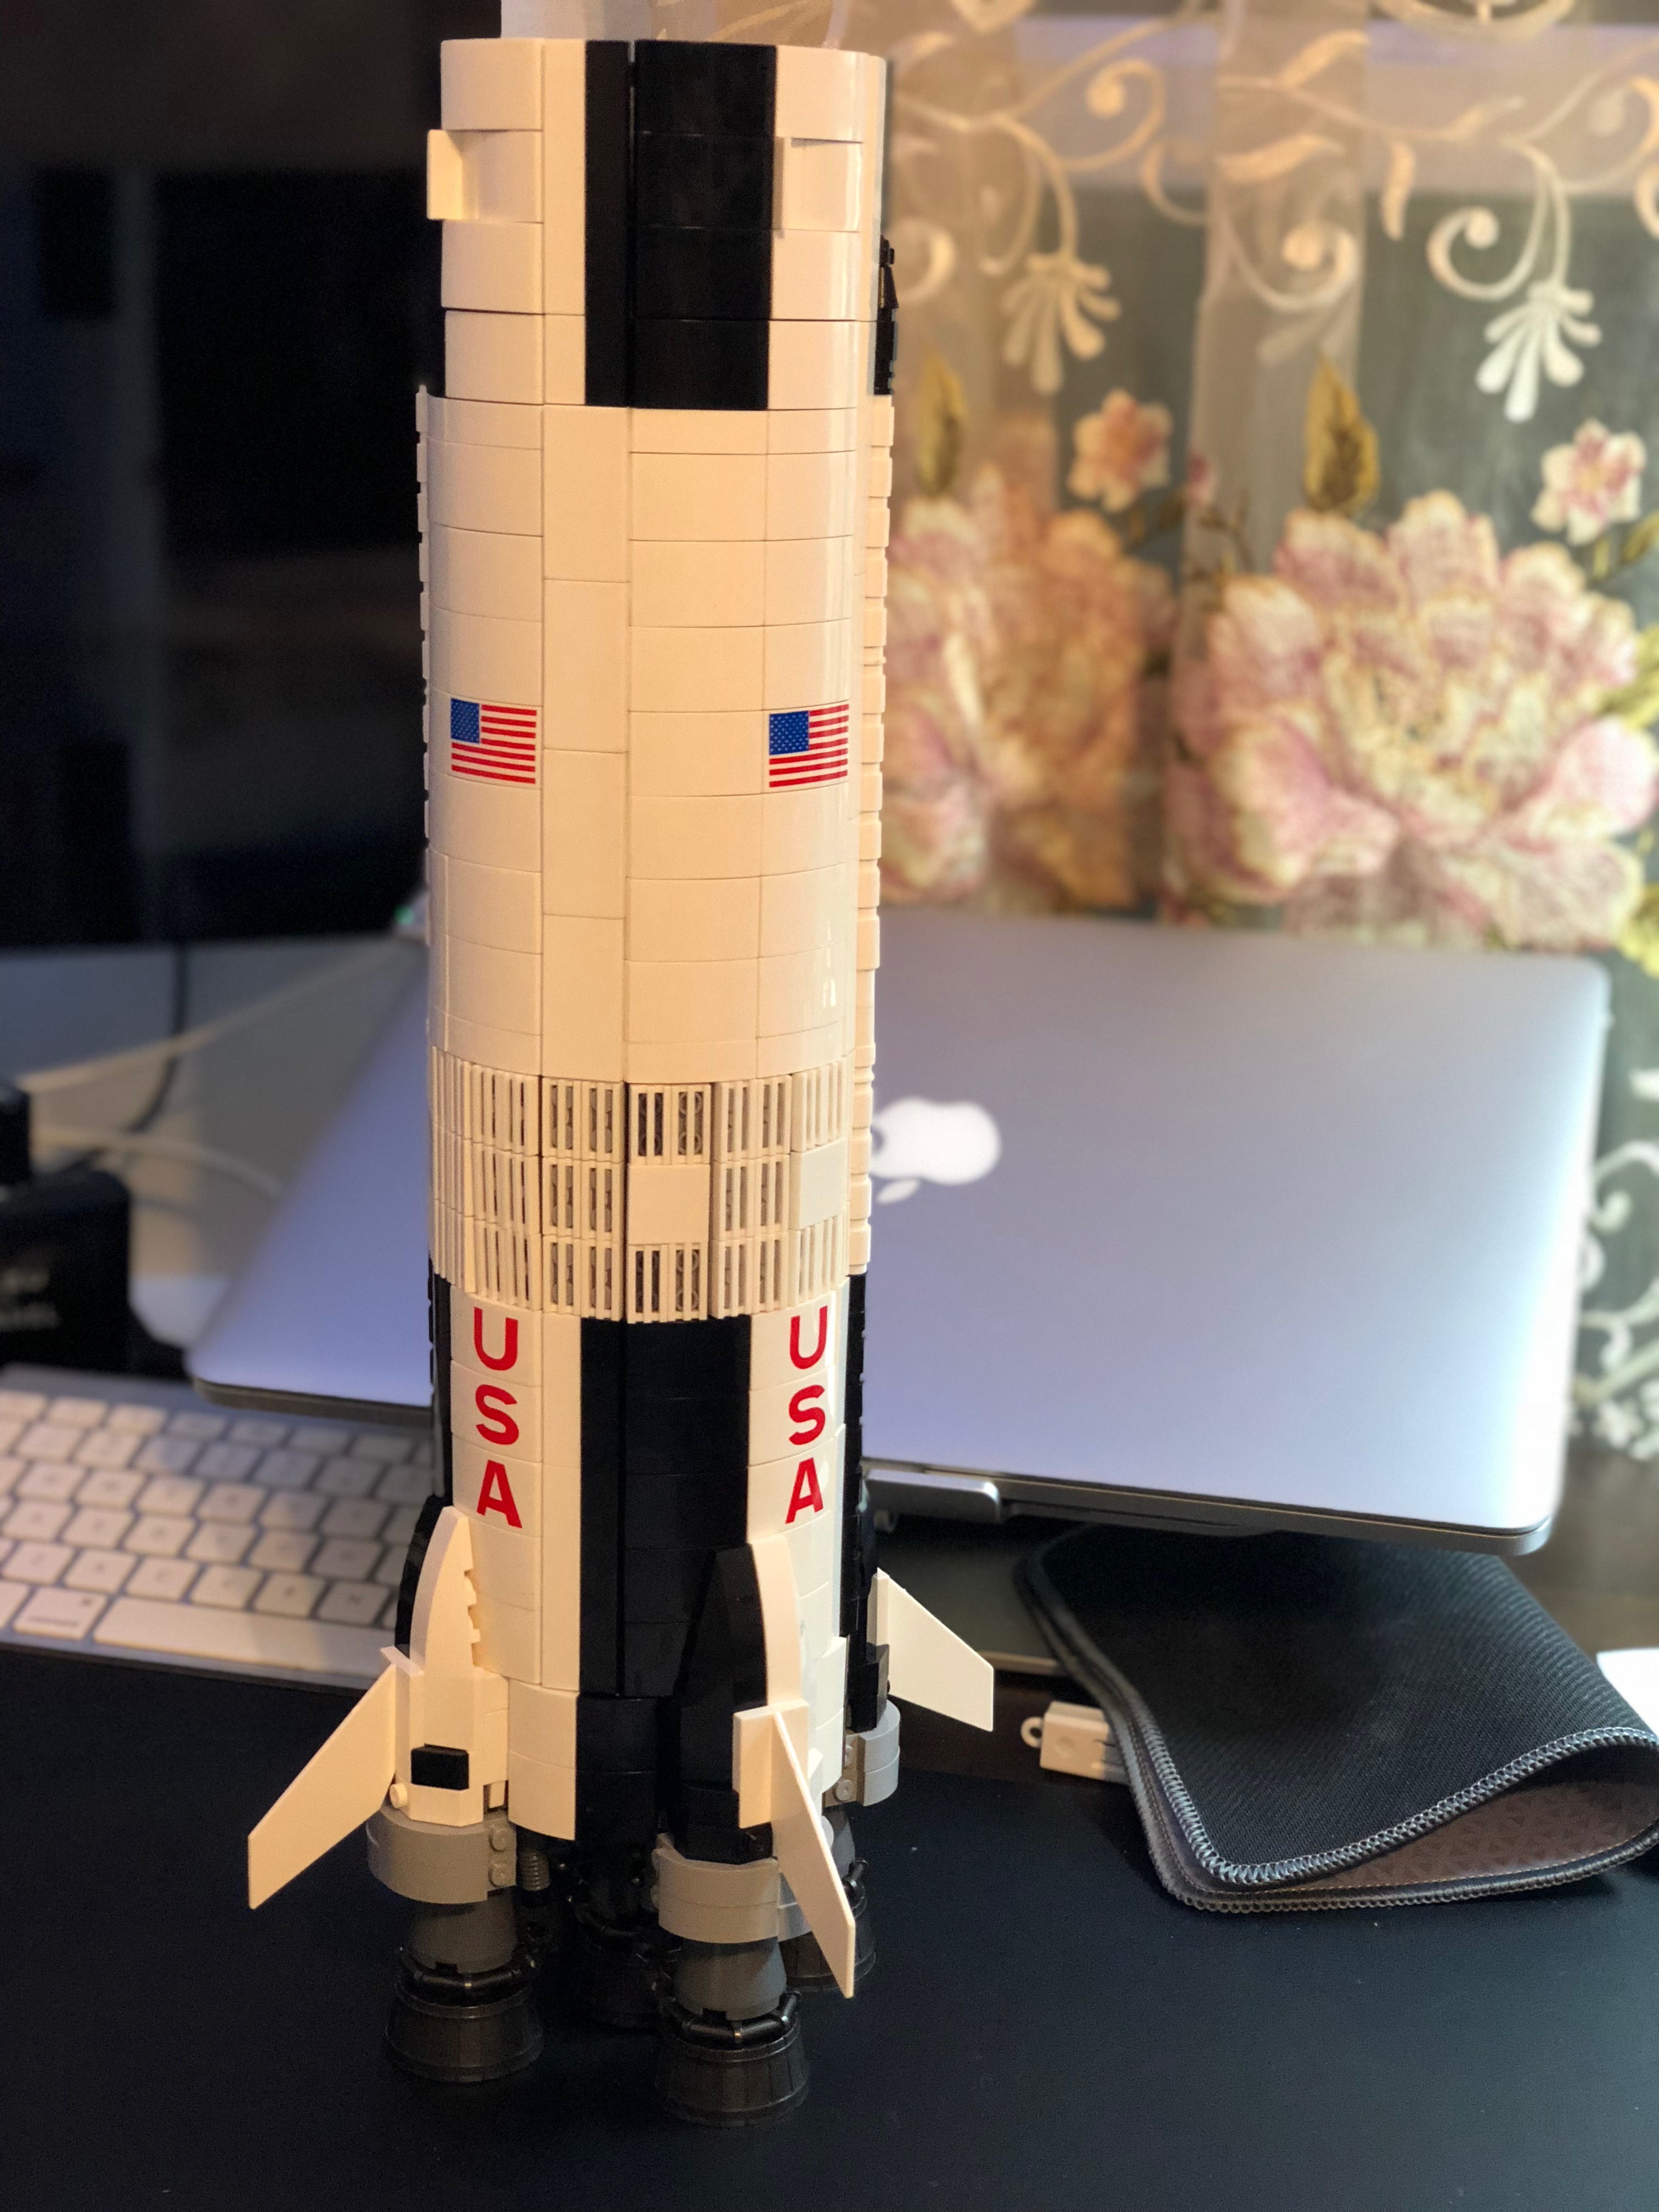
Second Stage
Second stage is using the same technic, like first stage, be careful with the inner parts, making sure everything lines up well. Those tile pieces don’t fit in perfectly, trim the stub if needed.

When putting second stage on top of first stage, I need to squeeze the top of first stage a bit to allow the vertical holders catch well with the shafts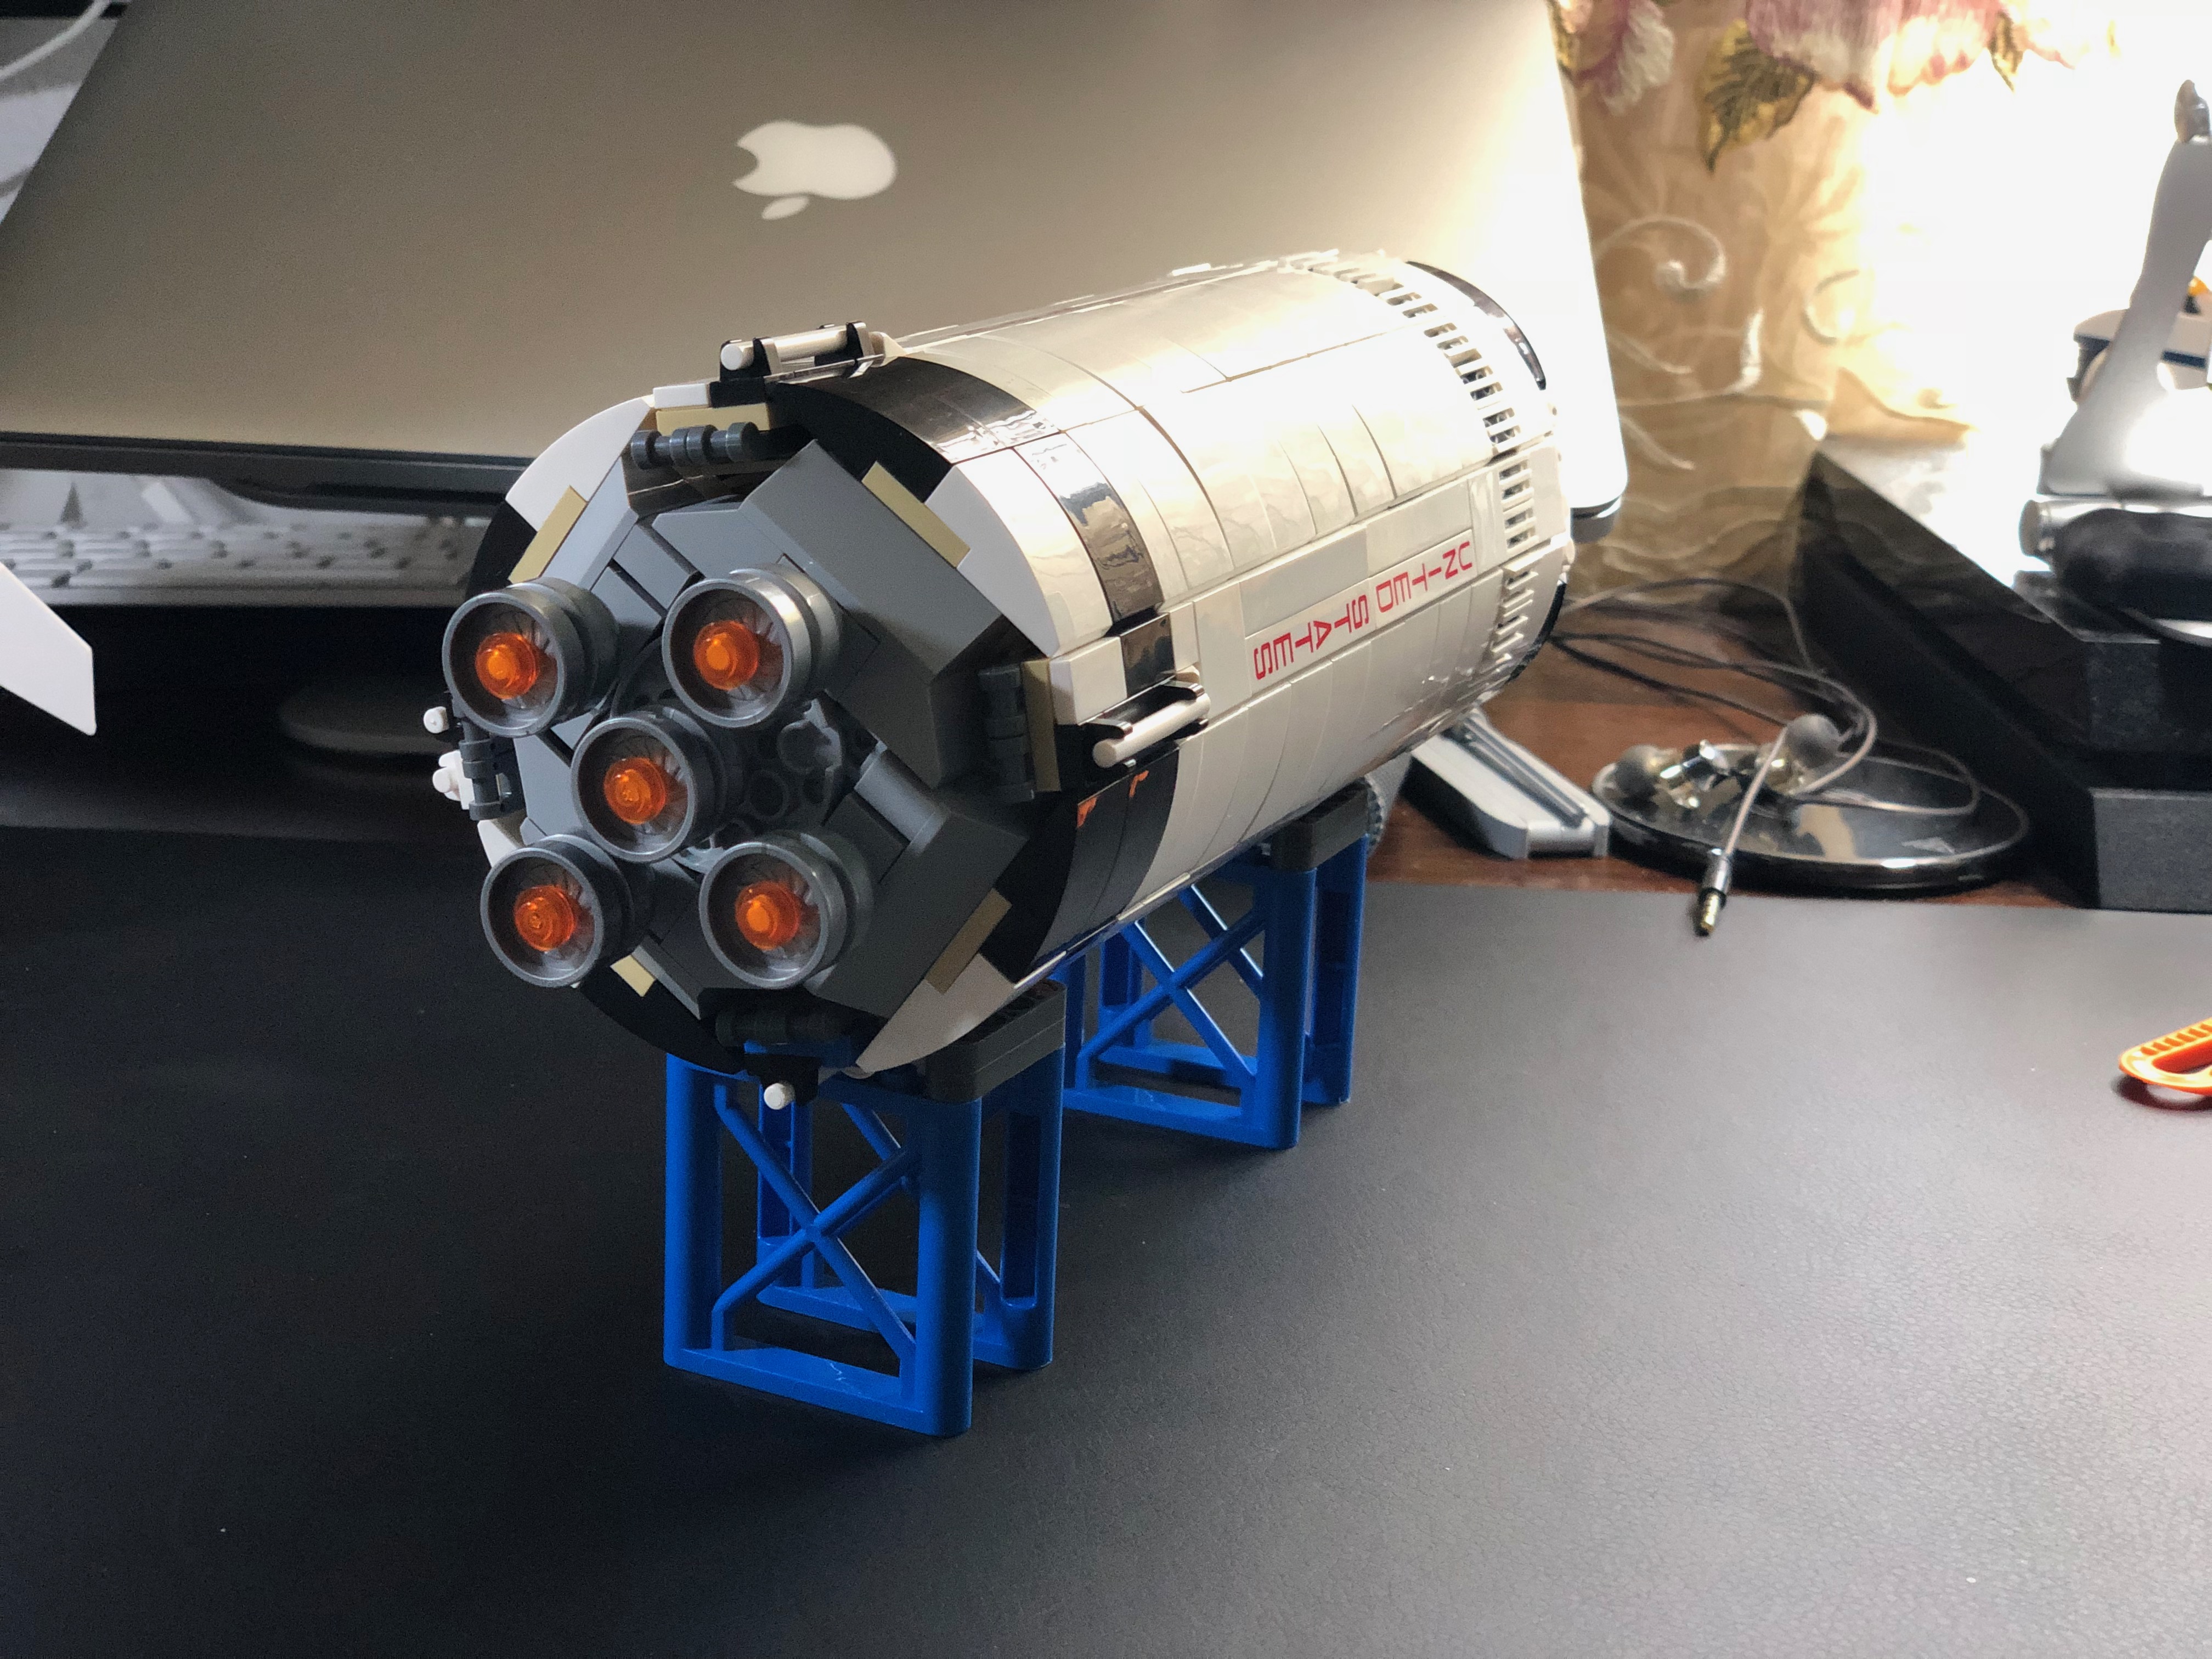
Third Stage
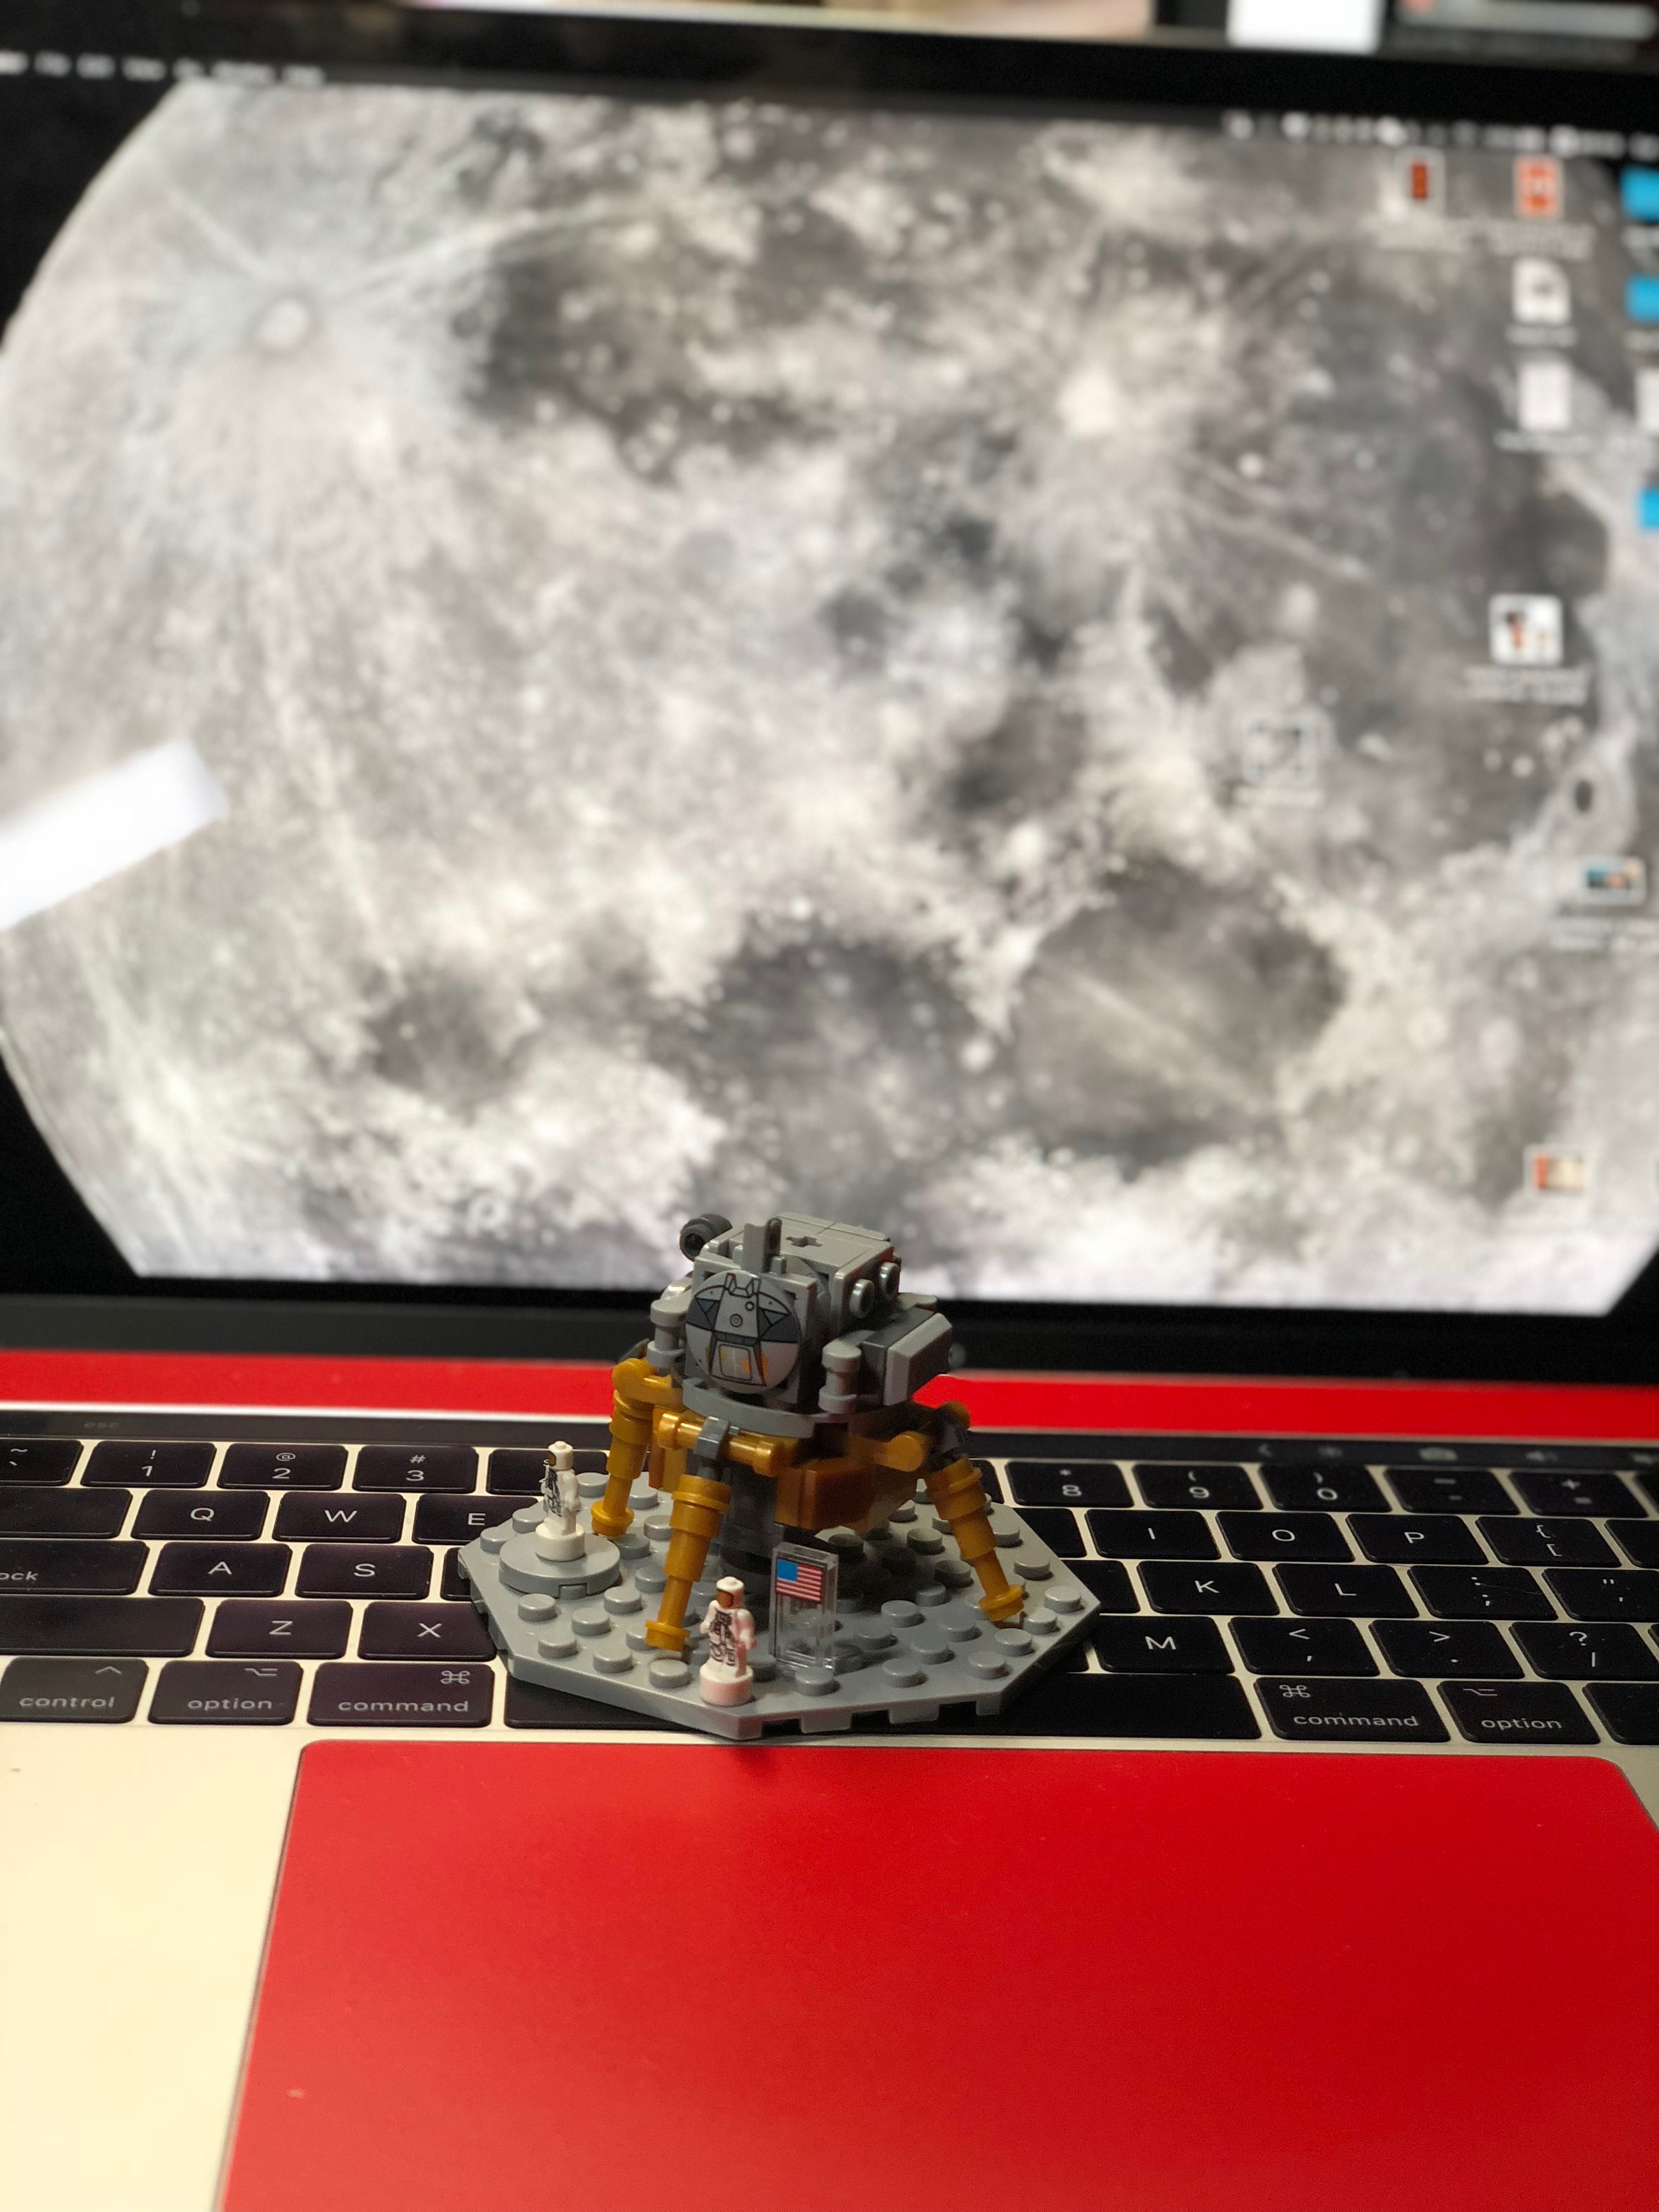
The inner part for third stage is much simpler than first couple stages, I only had issue with four towballs, what I did was, inserted towballs first then attached the whole pieces in. and finally the spacecraft and splashdown
Conclusion
This is an education set yet a piece of art to display on the shelve. Parents can build this with the kids, or even with friends, everybody take a stage and build them up. Since I do not have friends, onto the next build :) 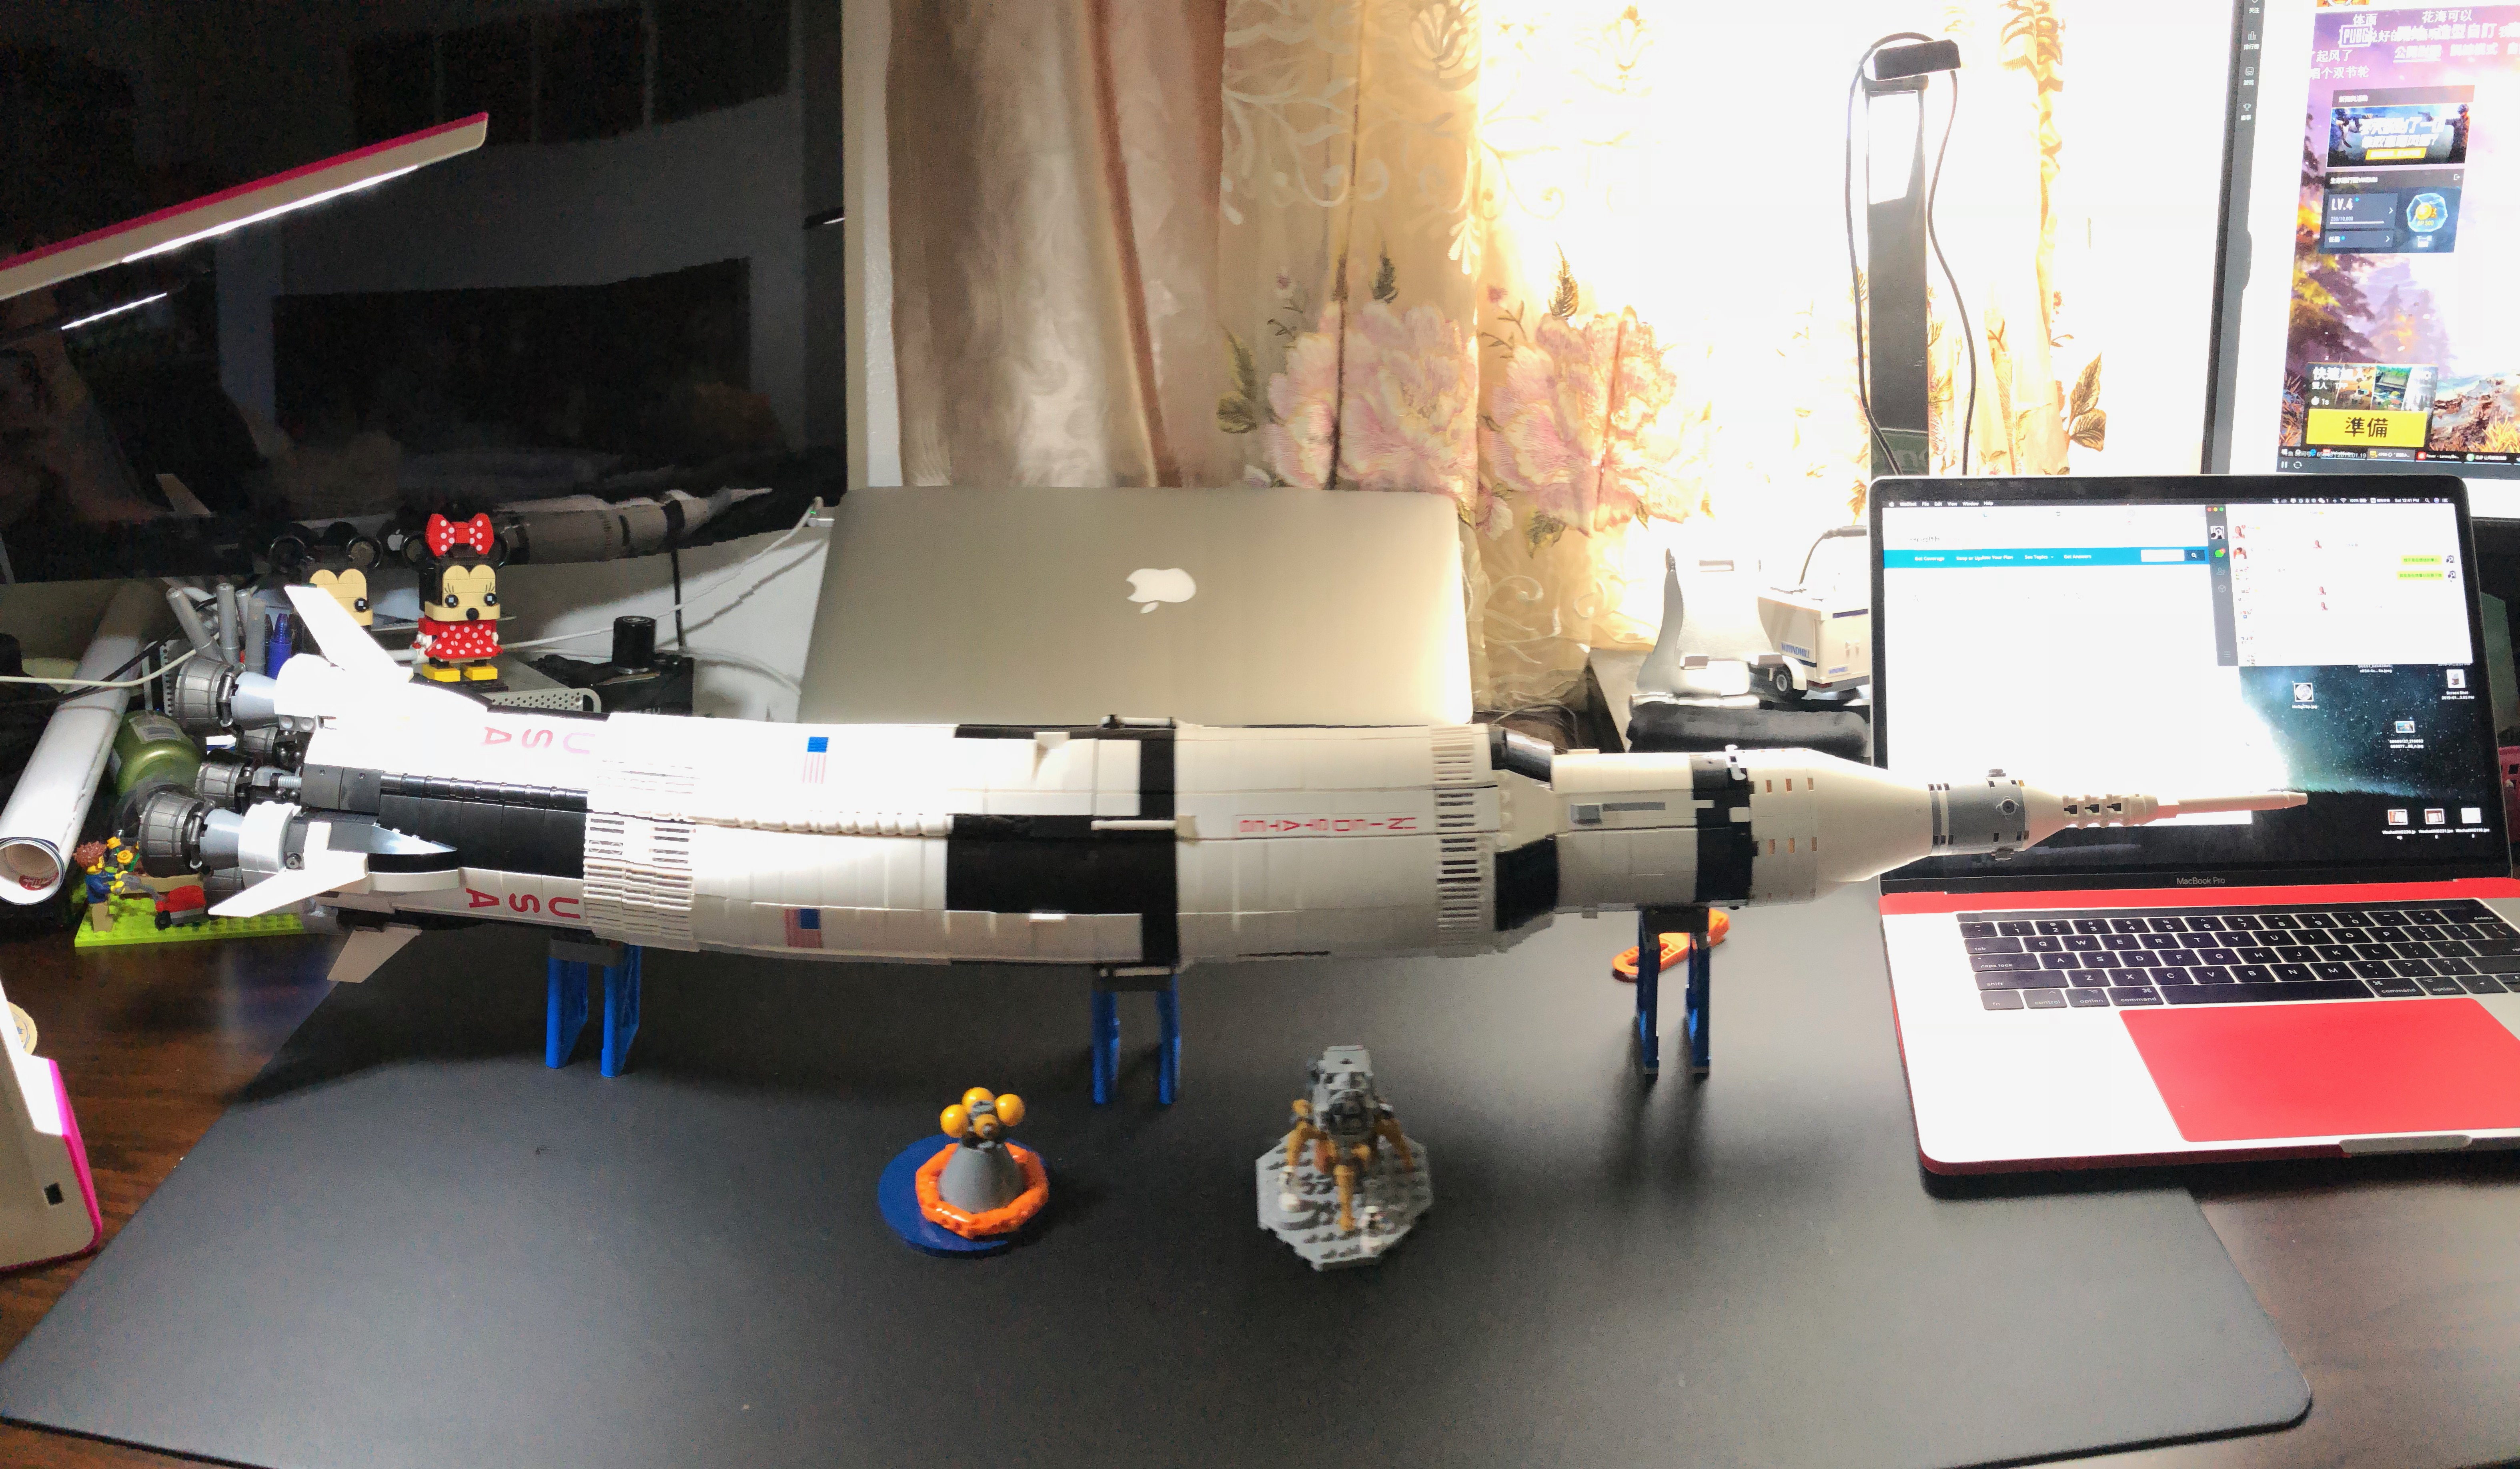
use 'saturn5' to get couple dollars off this set